BATURIN ® CRM
Adding or Reviewing Your First Lead
1. To add, review or edit your first lead, click CRM in the left sidebar, then select Leads at the top of the screen.
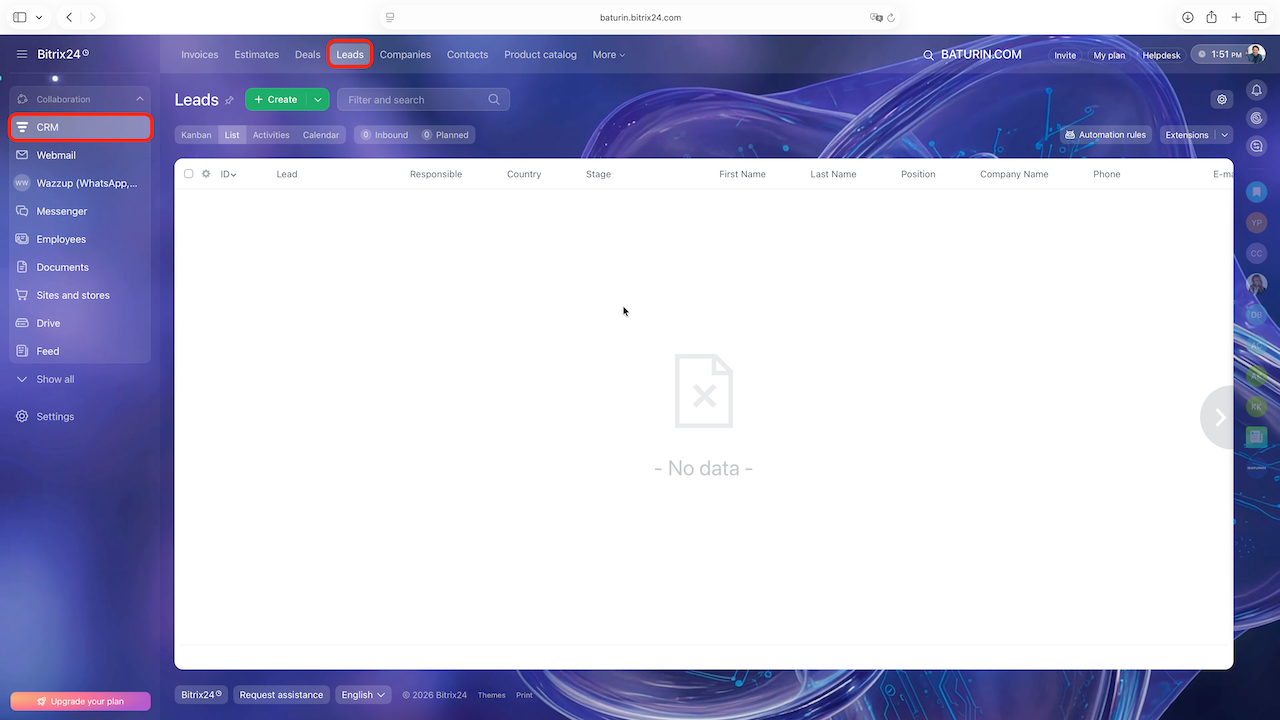
Inbound leads can come into BATURIN CRM through any of the following channels:
- A phone call from a prospective customer
- An email inquiry
- A message on WhatsApp, Instagram, or Facebook
- A request submitted through the form on the company website
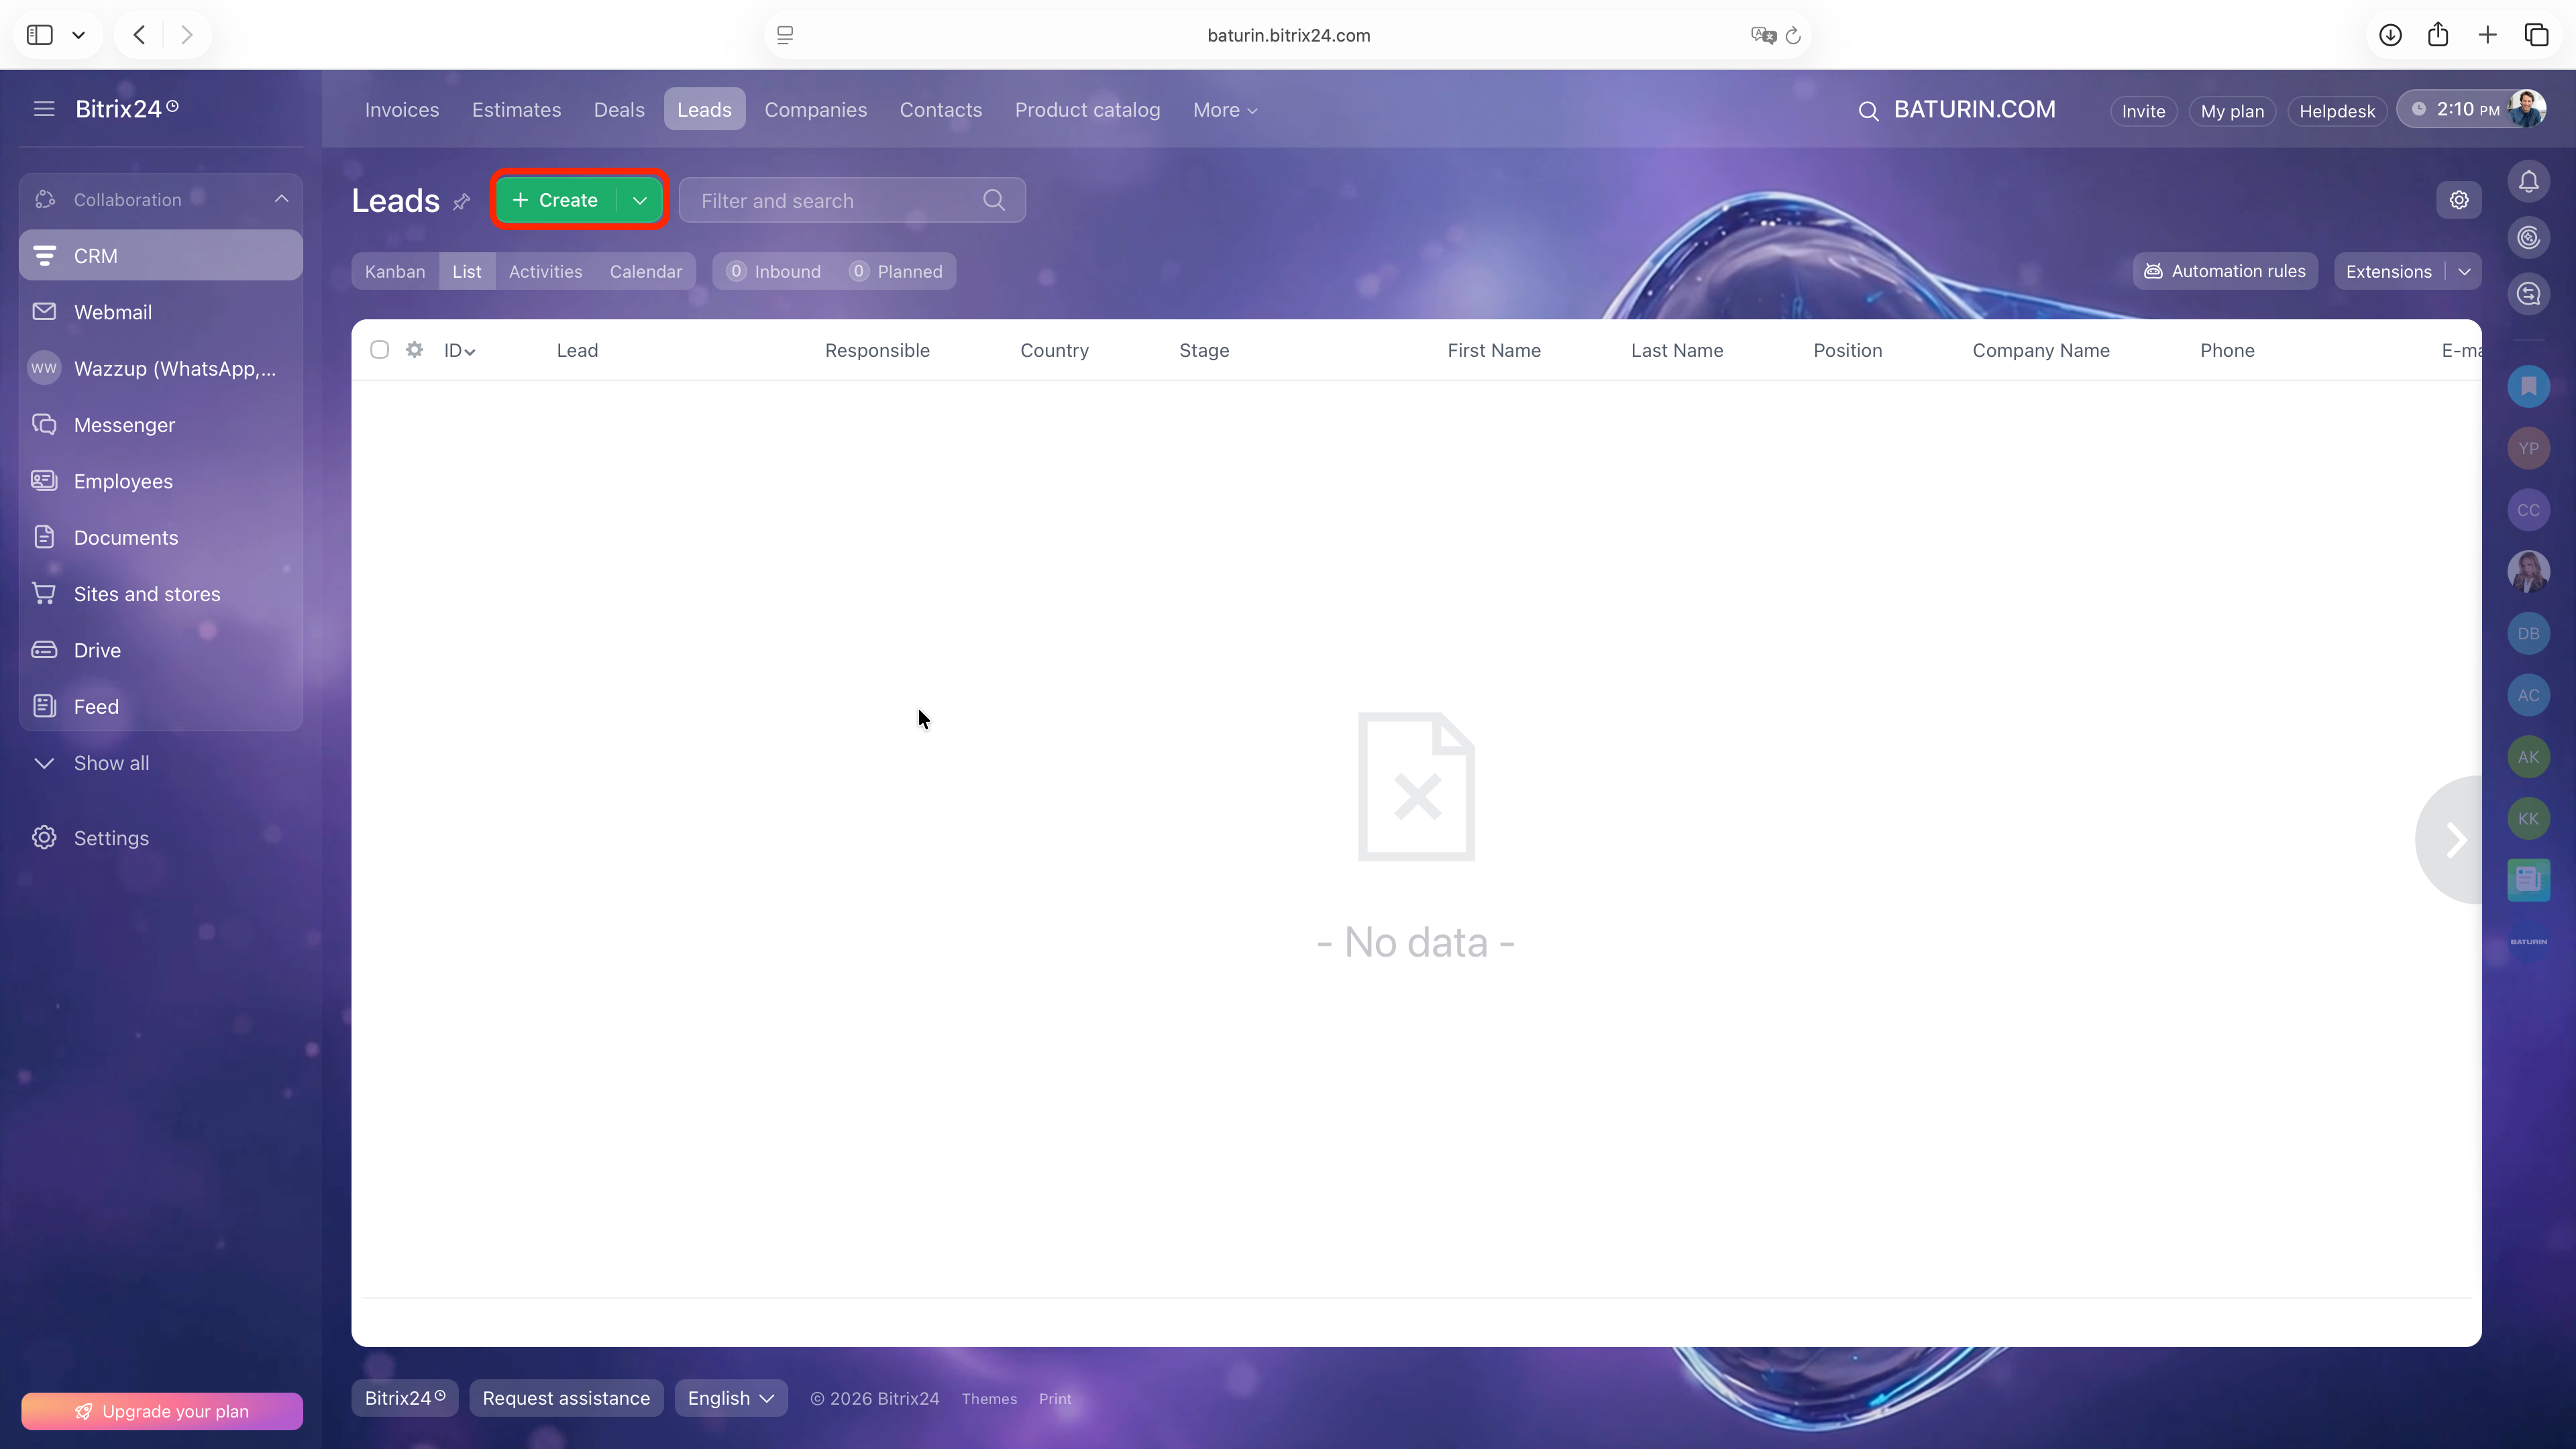
However, to reach out to any new prospect, you first have to manually create a lead. To do that, click the green Create button above the Leads List.
3. New Lead Dialog
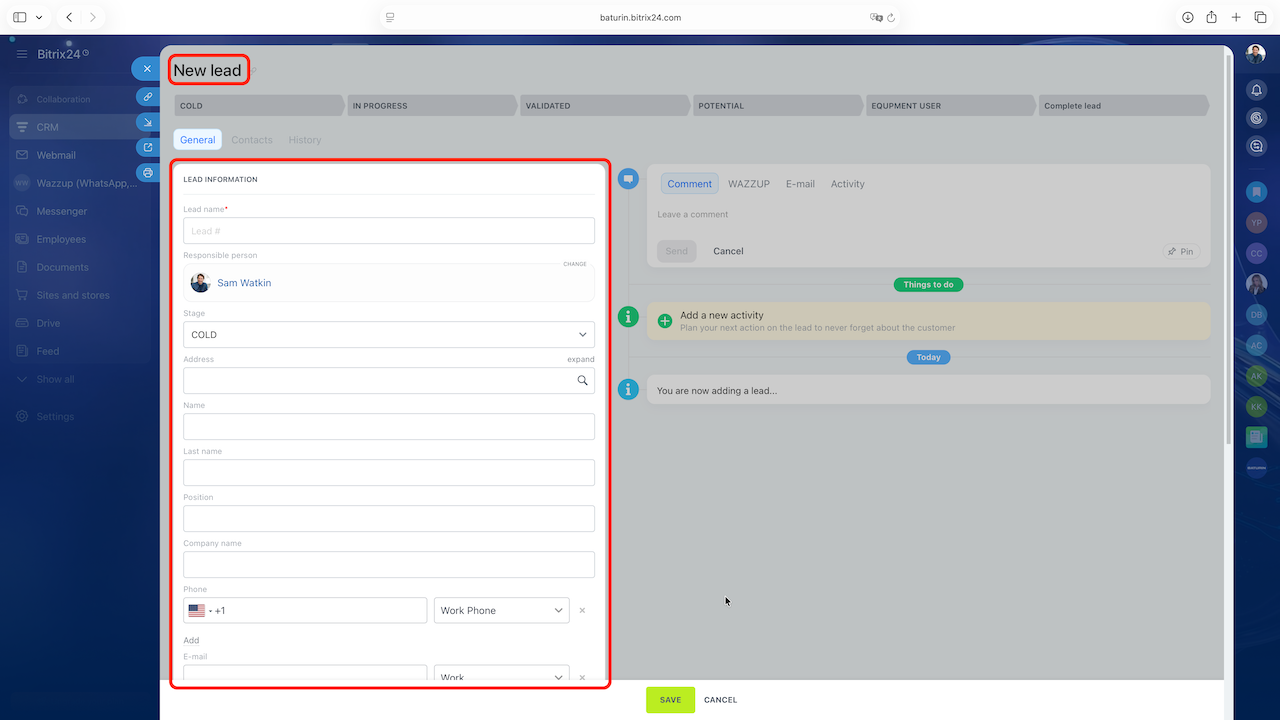
The New Lead dialog opens, with the fields on the left ready to edit.
4. Lead Name
Suppose you find a wastewater treatment plant through a web search. The plant is likely to use progressive cavity pumps, so it’s worth reaching out to learn about its needs and offer a suitable pump.
At this point, you have only:
- the company’s name
- address
- main phone number
- website
- general email address
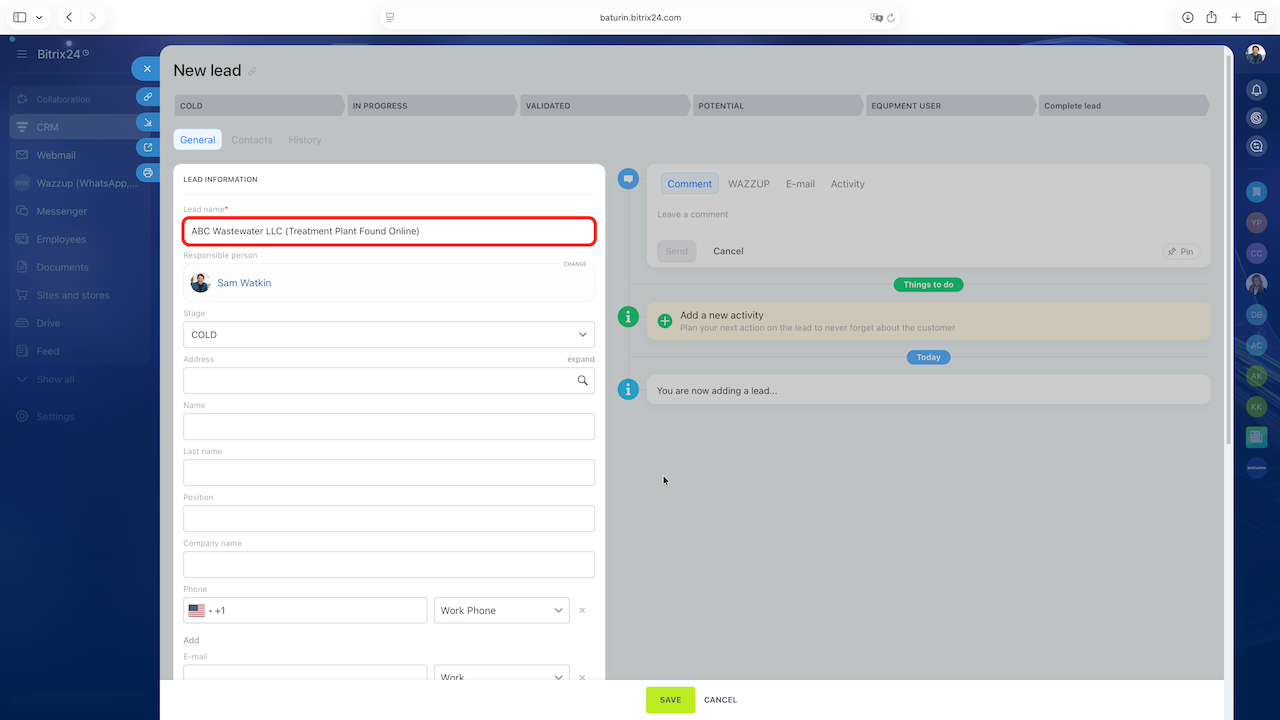
Start by entering a clear, descriptive Lead Name that’s easy to recognize in the Leads list. For this example, enter ABC Wastewater LLC (Treatment Plant Found Online).
5. Responsible Person
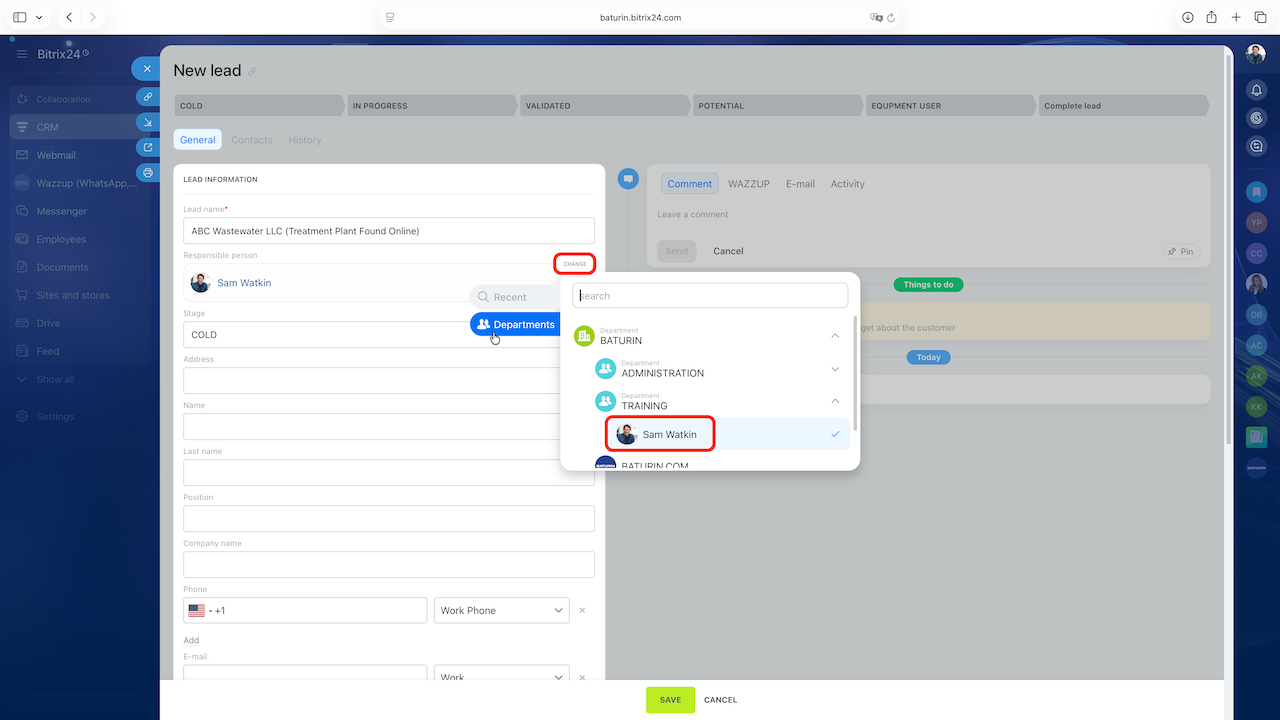
By default, you’re listed as the Responsible Person below the lead name. To assign the lead to a colleague, click Change and select their department and name from the list.
6. Lead Stage
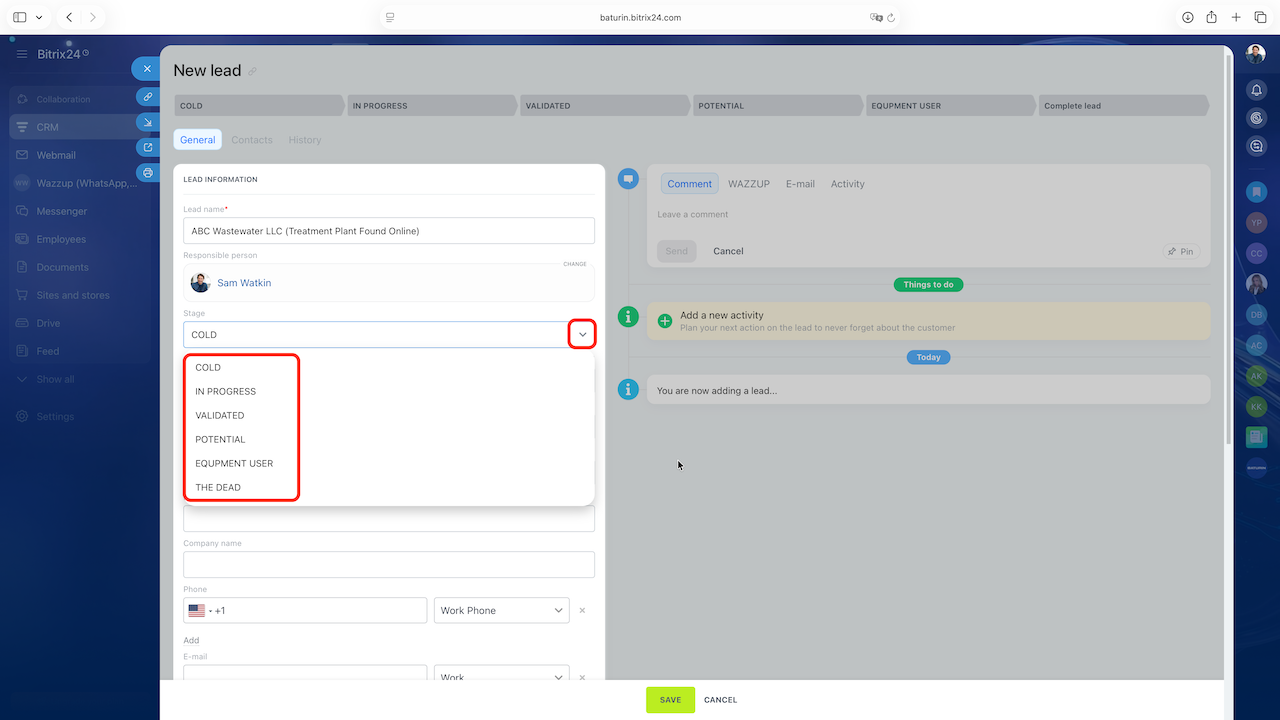
Every lead in BATURIN® CRM has a stage that shows where it is in the sales process. very new lead starts at COLD. It then moves through the following stages to reach COMPLETE LEAD:
- COLD - A new lead with insufficient contact information to reach the decision-maker.
- IN PROCESS - The Sales Assistant is researching the lead and gathering contact information.
- VALIDATED - The lead has enough contact information to reach the decision-maker.
- POTENTIAL - The prospect has expressed interest in a BATURIN® product.
- EQUIPMENT USER - The prospect has been confirmed to use equipment similar to what BATURIN® offers.
- THE DEAD - The lead has to potential.
In this example, leave the lead at COLD because you don’t yet have enough information to reach the decision-maker. If you plan to start researching the lead right away, move it to IN PROCESS stage.
7. Lead Address
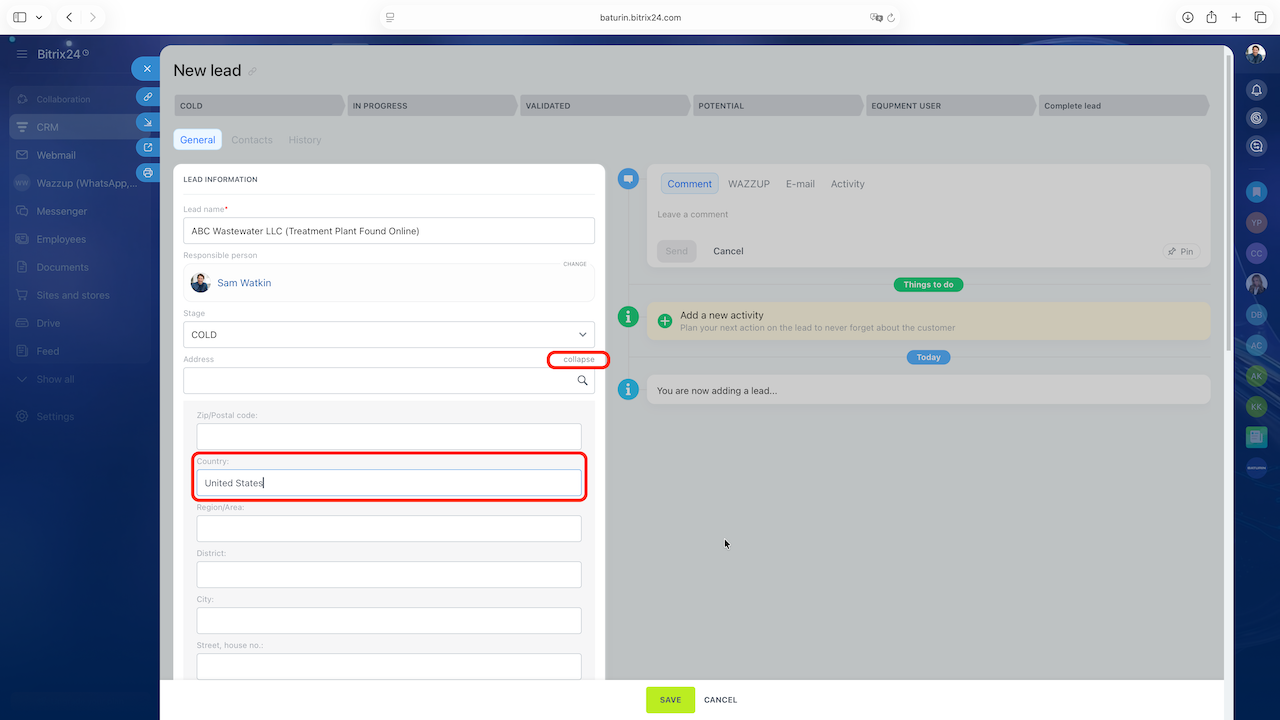
At this stage, you enter ONLY the lead’s country in the Address section. Click Expand in the upper-right corner of the Address field, then enter United States in the Country field and then click Collapse.
8. Other contact information
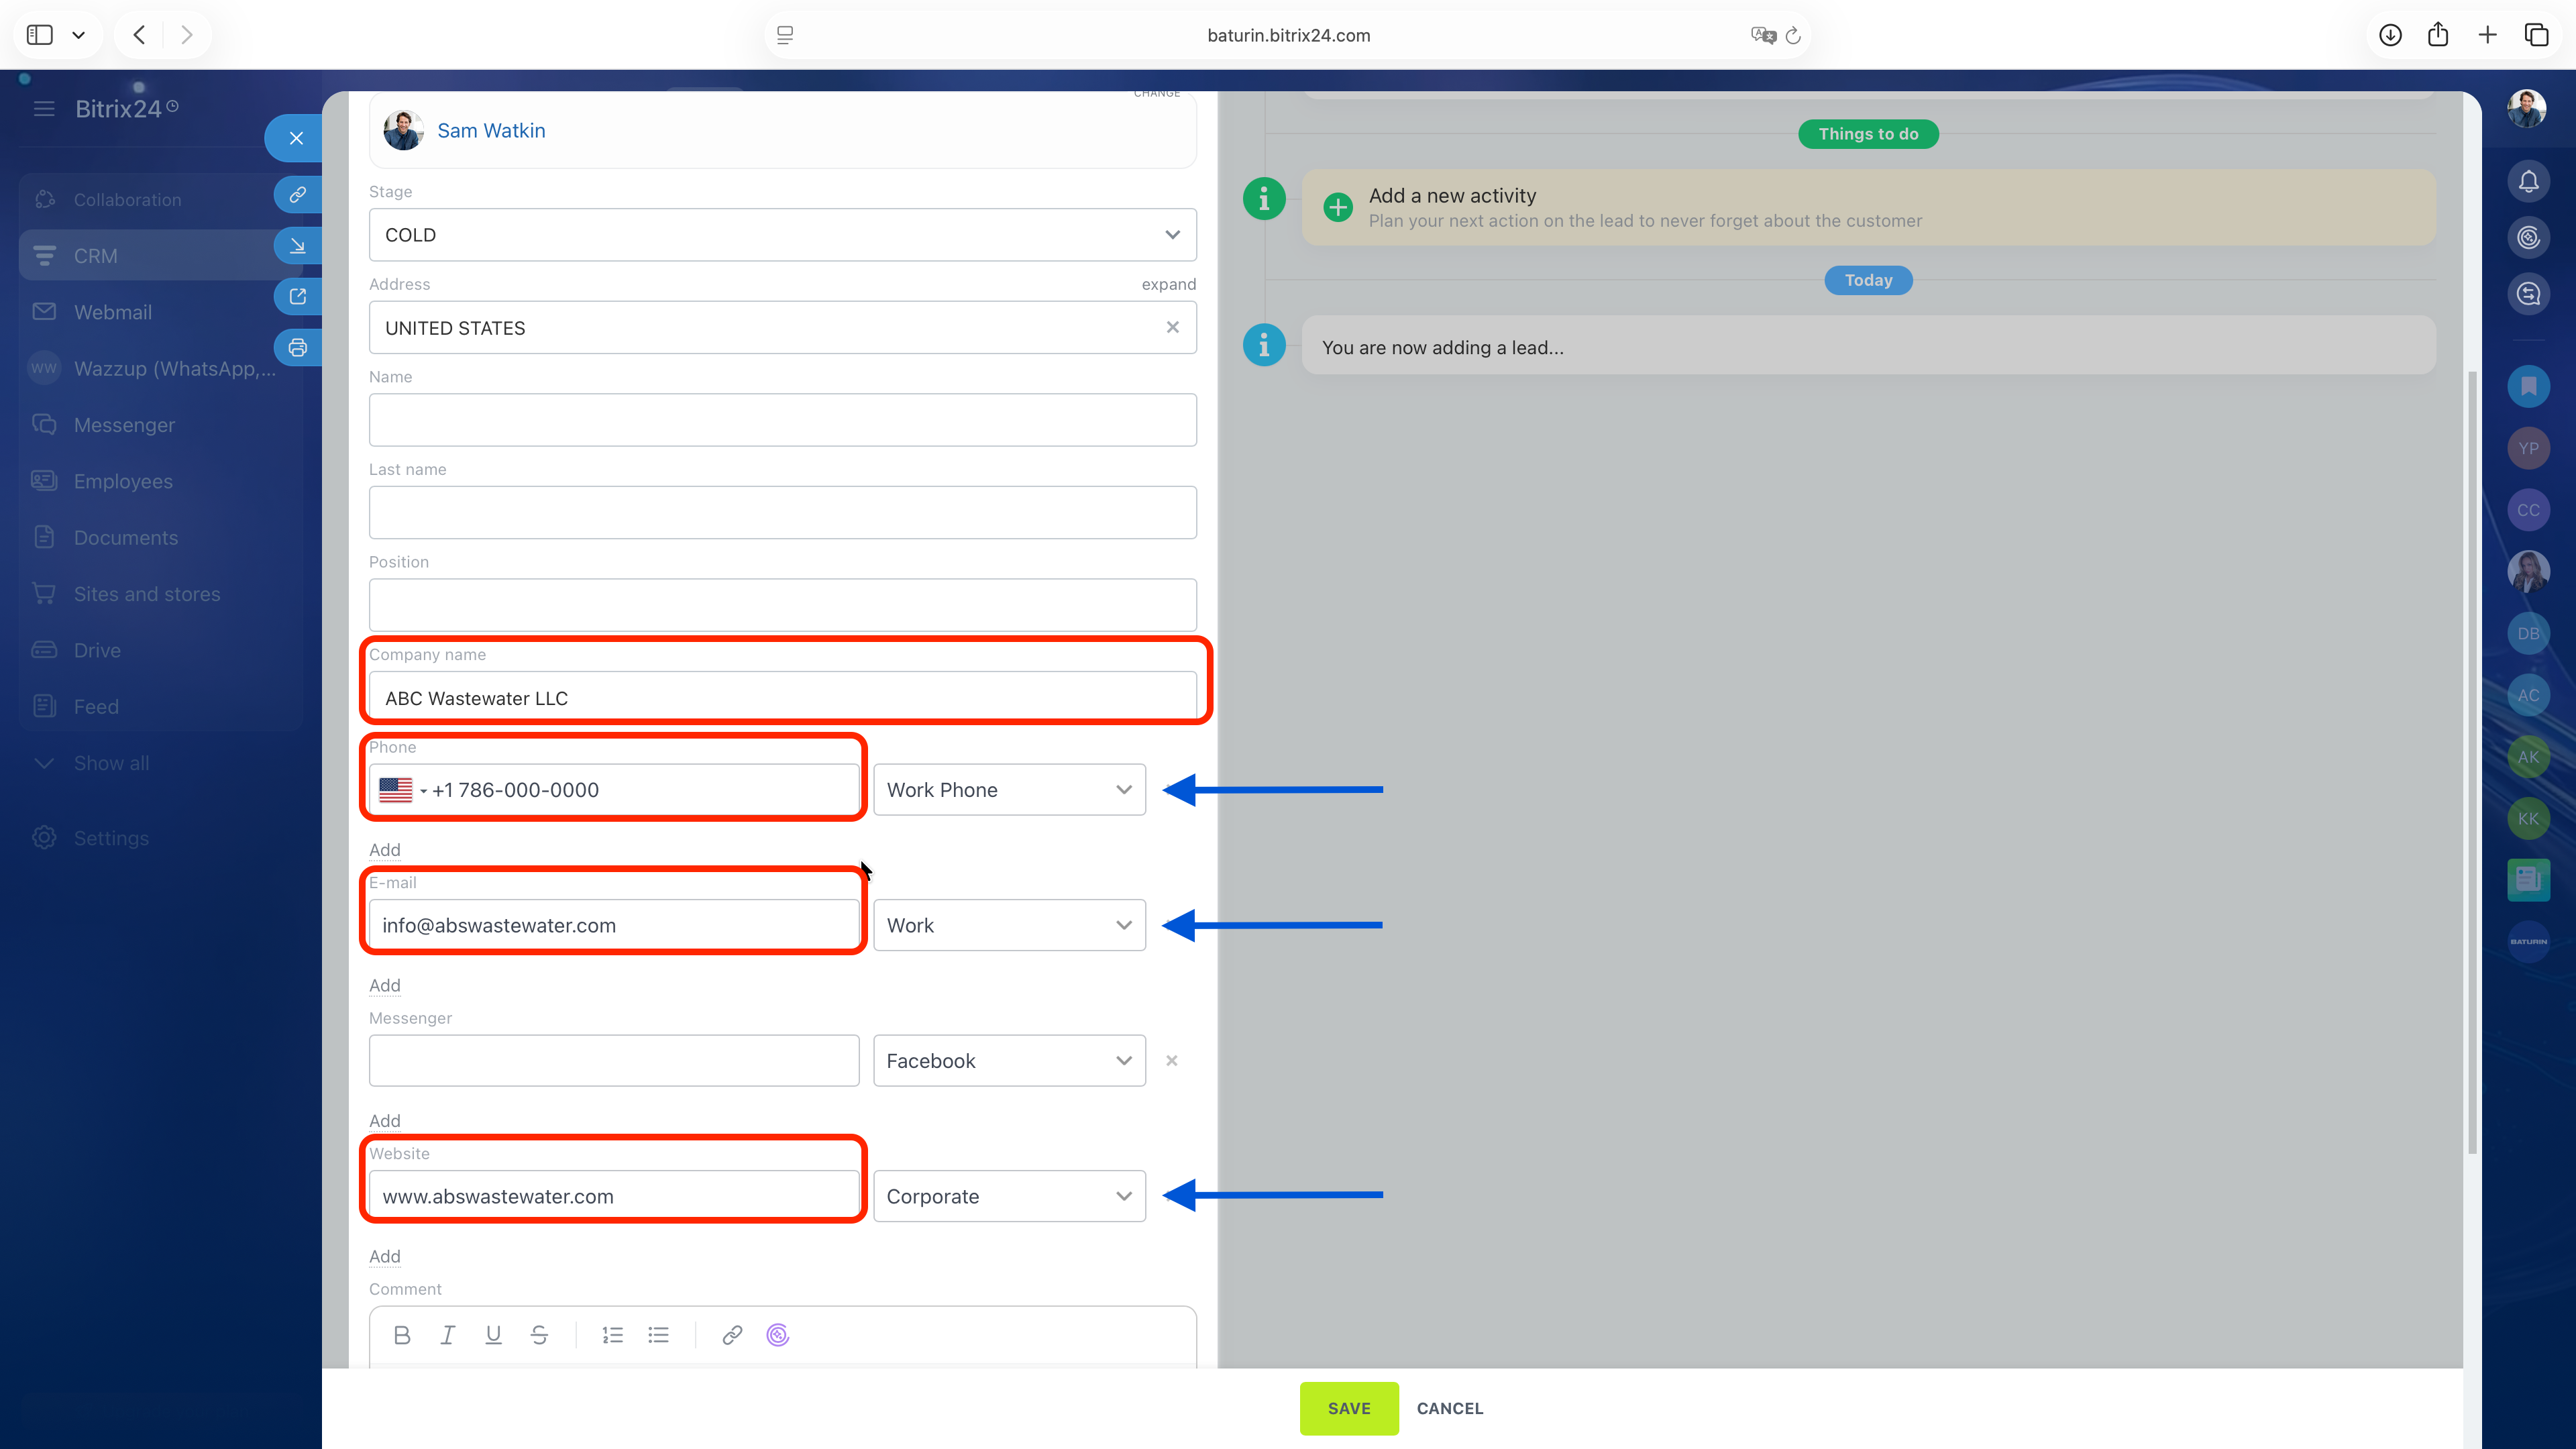
Once you’ve entered the country, fill in the remaining known information in the corresponding fields. For this example:
- Company name
- Phone number
- Email address
Don't forget to use the drop-down menus on the left to select the appropriate type for each contact detail.
8. Adding extra fields
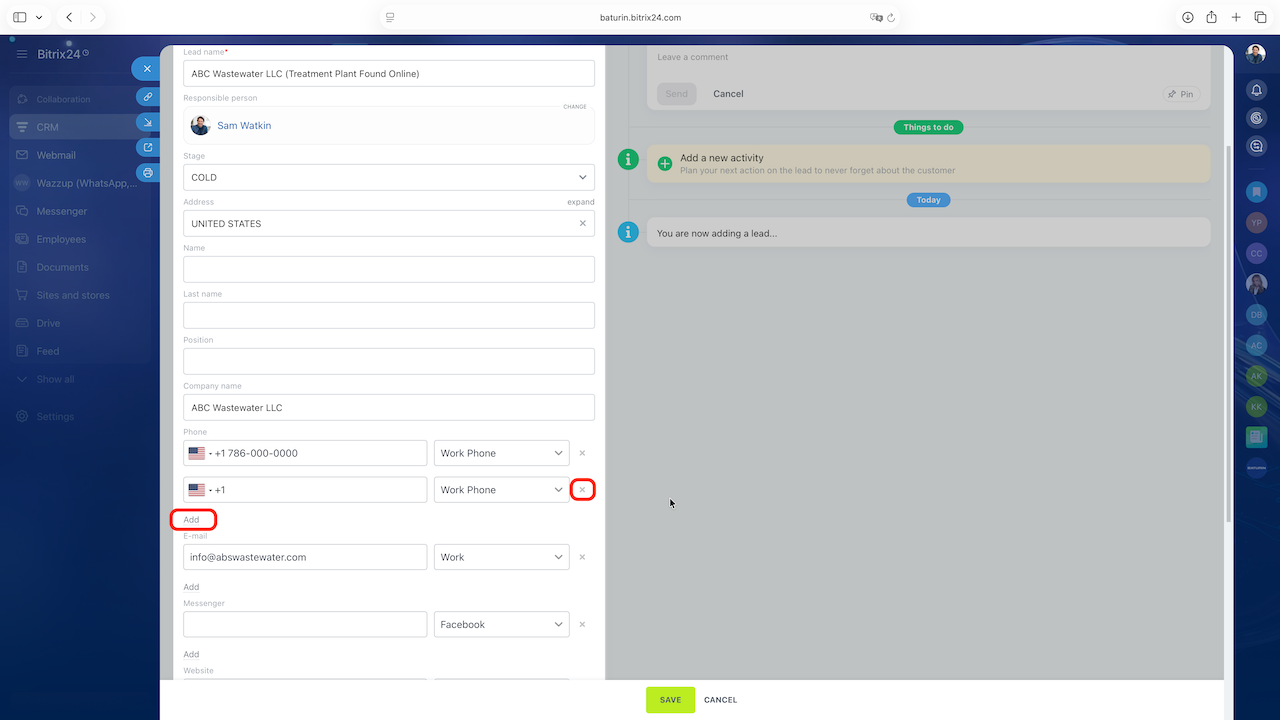
If you have more than one phone number or email address for the prospect, click Add below the corresponding field to enter another one. To remove an extra field, click the X icon to its right.
9. Comment
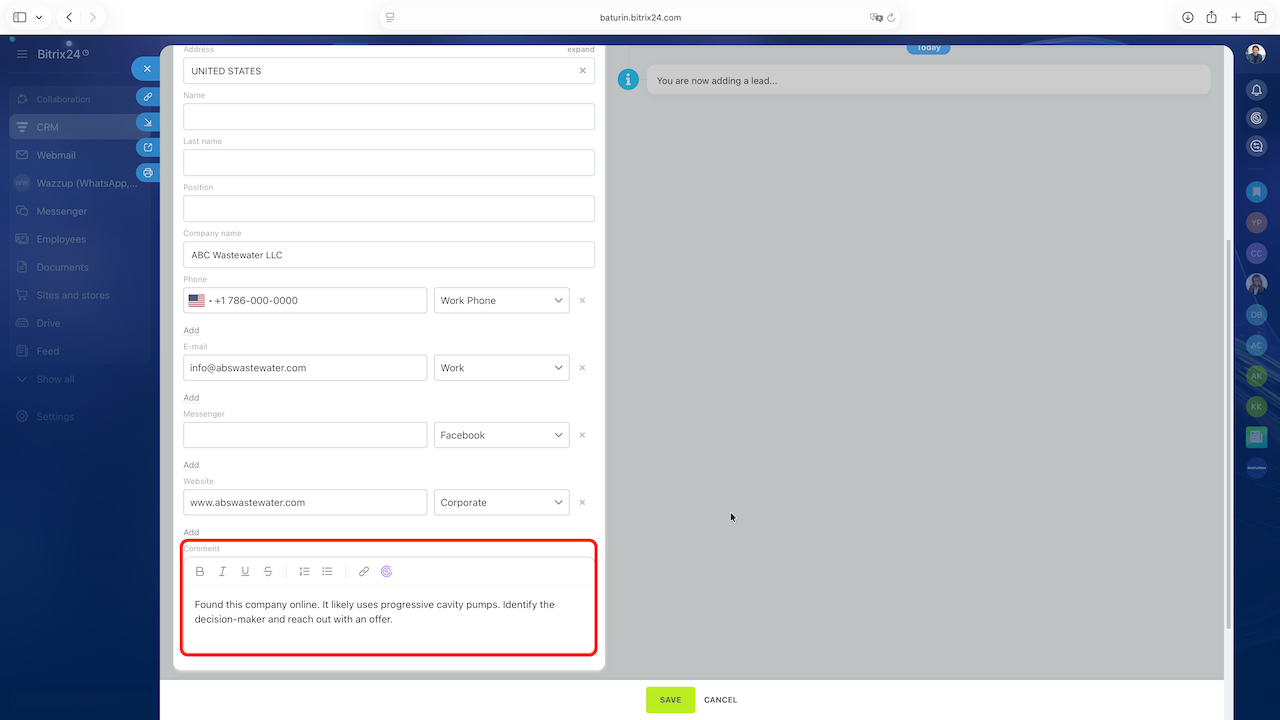
I highly recommend to add a Comment with any details that could help you or your supervisor follow up. As a rule of thumb, the more relevant context you include, the better.
9. Saving Lead
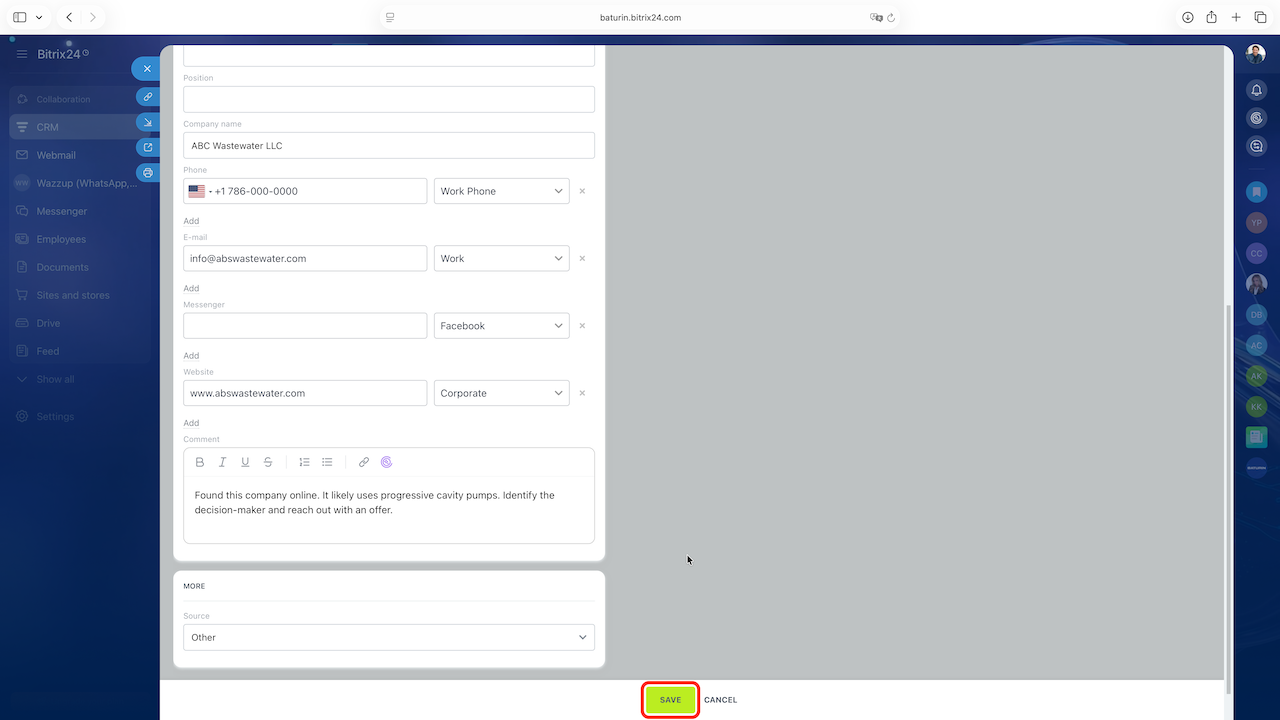
Once you’ve entered the lead information, click green SAVE button at the bottom of the dialog.
10. Updating or Adding Lead Information
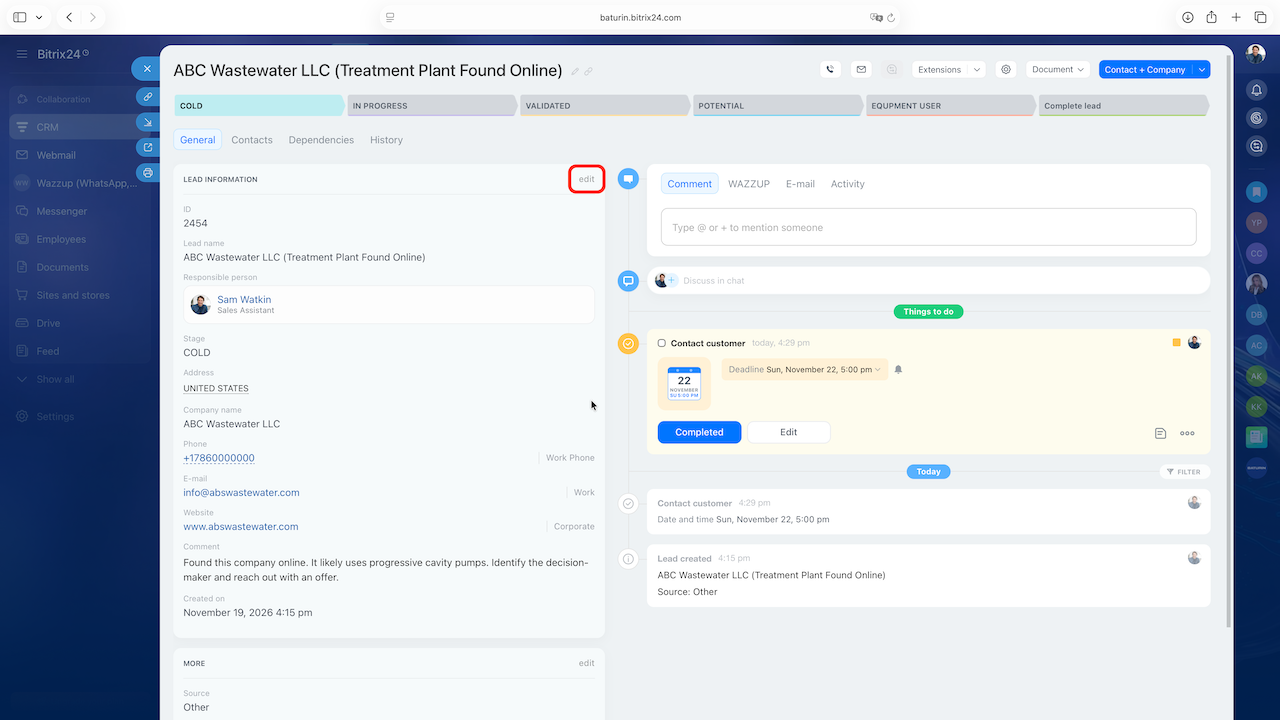
To update or add lead information, click Edit in the upper-right corner of the information section. When you’re finished, click the green SAVE button again.
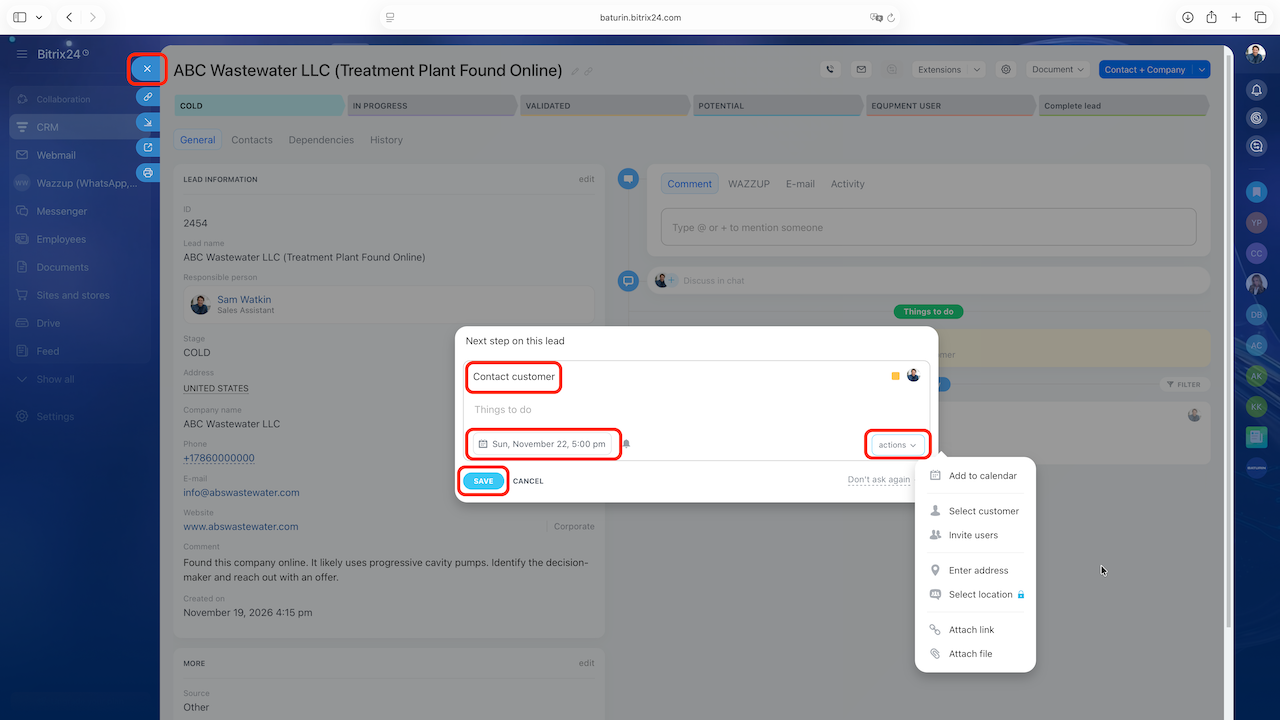
To close the lead dialog, click the X icon in the upper-left corner.
11. Closing The Lead Dialog
To close the lead dialog, click the X icon in the upper-left corner. In the reminder dialog that opens, specify the follow-up action and date, add any relevant details, and click the blue SAVE button.
12. List of The Leads
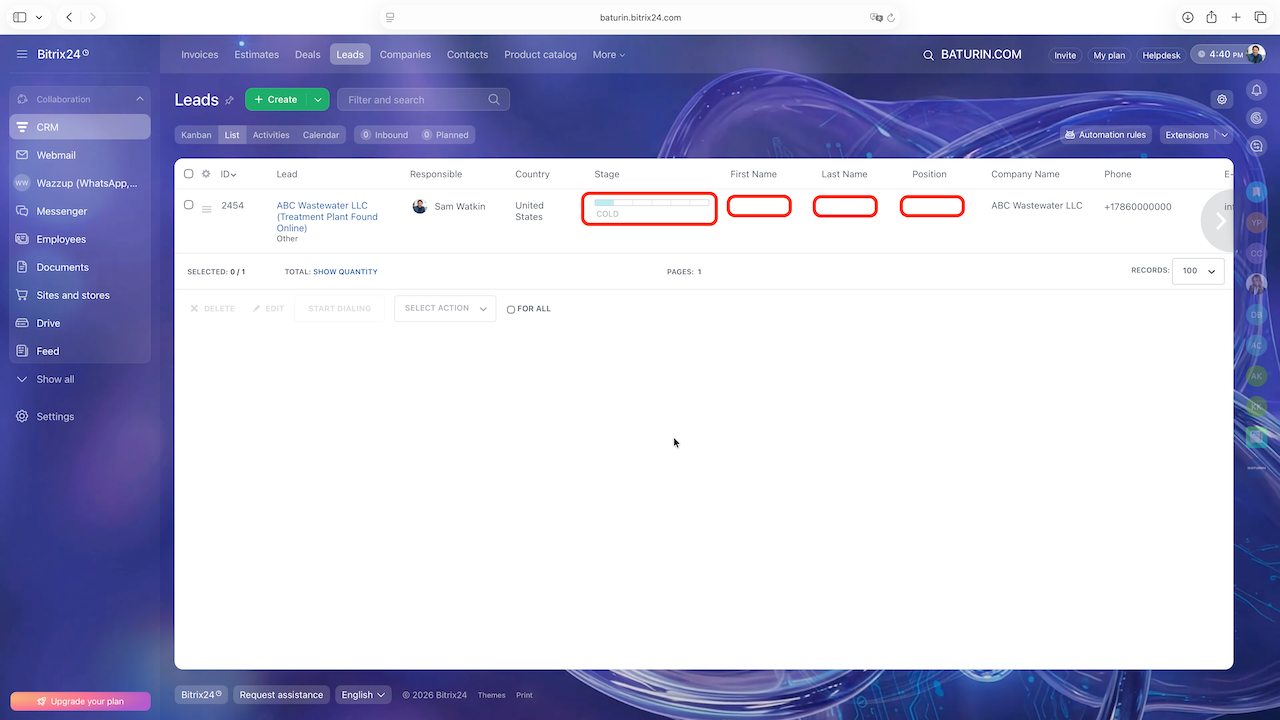
When you close the lead dialog, you’ll return to the Leads list.
In the Leads list, you can see how many leads you’re working with and check the stage of each lead. Blank cells show which details are missing for each lead.
BATURIN © 2026 All rights reserved.